Newsletter
RSS

Blog

Twitter Crawler and Status Analyzer with the Crawler-Lib Engine

Download Source Code: TwitterWorkflowElementsSample.zip

Crawling or sending multiple requests to social media service APIs must often handle with API quotas or limits. Most of the time this data needs further processing and therefore a complex processing logic. For example Twitter where short URLs are in the status. This sample shows how Twitter can be queried without violating API limits and how the short URLs are resolved in a uniform manner by using the Crawler-Lib Engine.

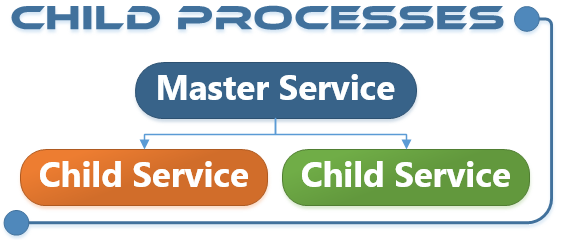
The Crawler-Lib Engine is a workflow enabled multipurpose background task processor. In contrast to dedicated web crawlers the task workflow can be freely defined and is not limited to HTTP requests. In this article shows how the Twitter library LinqToTwitter is used to build Twitter workflow elements for the Crawler-Lib Engine and to use it to retrieve a user timeline and analyze all short URLs in the tweets.

This code sample is extracted from a real world project called Social Media Assistant which uses the Crawler-Lib Engine to perform complex background tasks. Crawler-Lib has not yet provided workflow elements to access Twitter yet, but it is not very complicate to integrate any existing library like LinqToTwitter:

Building the Twitter Workflow Element

To use Twitter in the Crawler-Lib Engine the creation of a workflow element for every type of operation is recommended. We use the LinqToTwitter library to process the twitter requests. Any library with an callback or task based async mode can be used to build workflow elements. A processable workflow element has a StartWork() and a Process() . The start work method must ensure that the element is processed after the operation completes by calling RegisterWorkflowChildForProcessing(). In case of awaitable operations with tasks this is simply done with ContinueWith() on the task:

private Task<List<Status>> operation;
this.operation = query.ToListAsync();
this.operation.ContinueWith(c => this.Task.RegisterWorkflowChildForProcessing(this));

The LinqToTwitter library generates the request in form of a LINQ query which is generated in the StartWork() method of the workflow element:

protected override void StartWork()
{
	using (var twitterCtx = new TwitterContext(this.Config.Authorizer))
	{
		var query =
		twitterCtx.Status.Where(
		tweet =>
		tweet.Type == StatusType.User && tweet.Count == this.config.Count
		&& tweet.IncludeContributorDetails == this.config.IncludeContributorDetails
		&& tweet.TrimUser == this.config.TrimUser);
		if (!string.IsNullOrEmpty(this.config.ScreenName))
		{
			query = query.Where(tweet => tweet.ScreenName == this.config.ScreenName);
		}
		if (this.config.ID != null)
		{
			query = query.Where(tweet => tweet.ID == this.config.ID.Value);
		}
		if (this.config.MaxID != null)
		{
			query = query.Where(tweet => tweet.ID == this.config.MaxID.Value);
		}
		if (this.config.SinceID != null)
		{
			query = query.Where(tweet => tweet.ID == this.config.SinceID.Value);
		}
		if (this.config.UserID != null)
		{
			query = query.Where(tweet => tweet.ID == this.config.UserID.Value);
		}
		this.operation = query.ToListAsync();
		this.operation.ContinueWith(c => this.Task.RegisterWorkflowChildForProcessing(this));
	}
} 	

After the operation completes it is registered for processing. The next free worker thread picks it up and calls Process(). In the process method are various handers executed:

protected override void Process()
{
	if (this.operation.IsFaulted)
	{
	this.MarkFailed(this.operation.Exception);
	}
	else if (this.operation.IsCompleted)
	{
	this.Statuses = this.operation.Result;
	}
	switch (this.ProcessingInfo.InfoVerbosity)
	{
	case ProcessingInfoBase.VerbosityEnum.Data:
	{
	this.ProcessingInfo.Statuses = this.Statuses == null ? new Status[0] : this.Statuses.ToArray();
	}
	break;
	}
	try
	{
		if (this.ProcessingInfo.Success)
		{
			if (this.Config.Successful != null)
			{
			this.Config.Successful.Invoke(this);
			}
			if (this.Config.Finally != null)
			{
			this.Config.Finally.Invoke(this);
			}
			if (this.awaiter != null && this.Config.AwaitProcessing.HasFlag(AwaitProcessingEnum.Success))
			{
				this.awaiter.ExecuteContinuation(this);
			}
		}
		else
		{
			if (this.Config.Failed != null)
			{
			this.Config.Failed.Invoke(this);
			}
			if (this.Config.Finally != null)
			{
			this.Config.Finally.Invoke(this);
			}
			if (this.awaiter != null && this.Config.AwaitProcessing.HasFlag(AwaitProcessingEnum.Failed))
			{
				this.awaiter.ExecuteContinuation(this);
			}
		}
	}
	catch (Exception ex)
	{
		this.MarkFailed(ex);
		throw;
	}
} 
	

These are the basics workflow elements for the integration of arbitrary APIs. Now let’s use the new element in a task.

Building the Read User Timeline Task

We have several objectives here. First of all we don’t want Twitter to block our application because we violate API limits. Second we don’t want to flood the short URL service with too many requests. Third we want to retrieve the link information in parallel to keep the processing time of this task low.

The get user timeline request can return 200 statuses (Tweets). If every status has an URL or two we have 200-400 web requests. If we don’t send the requests in parallel, it can take a while until the links are analyzed. Here is the implementation:

	
public override async void StartWork()
{
	base.TaskResult = new ReadTwitterTimelineTaskResult();
	this.TaskResult.ScreenName = this.TaskRequest.ScreenName;
	this.TaskResult.Items = new List<TwitterStatusItem>();
	var authorizer = new SingleUserAuthorizer
	{
		CredentialStore =
		new SingleUserInMemoryCredentialStore
		{
			ConsumerKey = this.TaskRequest.ConsumerKey, 
			ConsumerSecret = this.TaskRequest.ConsumerSecret, 
			AccessToken = this.TaskRequest.AccessToken, 
			AccessTokenSecret = this.TaskRequest.AccessTokenSecret
		}
	};
	UserTimeline userTimeline = null;
	try
	{
		await new Limit(
			new LimitConfig { LimiterName = "TwitterLimiter", 
				StartWork = limited => 
				{ 
					userTimeline = new UserTimeline(authorizer, this.TaskRequest.ScreenName); 
				} });
			var analyzedResult = await this.AnalyzeTwitterStatus(userTimeline.Statuses);
			this.TaskResult.Items = analyzedResult.Result;
	}
	catch (Exception exception)
	{
		if (userTimeline != null)
		{
			userTimeline.MarkFailed(exception);
		}
	}
} 
	

Our new UserTimeline workflow element is executed within a Limit workflow element which enforces the Twitter limits. The limits are added to the Crawler-Lib Engine after creation. There are multiple possibilities how to configure the limiter. Assuming we have user authentication and a limit of 180 requests/ 15 minutes the first configuration allows the 180 requests (in parallel) and blocks the execution of further requests for 15 minutes:

engine.AddLimiter(
	new QuotaLimiter(
		new QuotaLimiterConfig
		{
			Name = "TwitterLimiter",
			LimitedThroughput = 180,
			LimitedThroughputInterval = TimeSpan.FromMinutes(15),
			LimitedThroughputWorkingMax = 180,
			LimitedThroughputIdleMax = 180,
		}));
	

The second configuration allows one request every 5 seconds so that the limit of 180 requests / 15min won’t be broken.

engine.AddLimiter(
	new QuotaLimiter(
		new QuotaLimiterConfig
		{
			Name = "TwitterLimiter", 
			LimitedThroughput = 1, 
			LimitedThroughputInterval = TimeSpan.FromSeconds(5), 
			LimitedThroughputWorkingMax = 1, 
			LimitedThroughputIdleMax = 1
			})); 

These implementations use throughput limitation to delay requests. There are much more possibilities to do this.

After the User timeline is received, it should be analyzed and the short URLs should be resolved. This is done in the AnalyzeTwitterStatus() method:

private CalculateResult<List<TwitterStatusItem>> AnalyzeTwitterStatus(List<Status> statusses)
{
	var result = new Calculate<List<TwitterStatusItem>, TwitterStatusItem>(
	calc =>
		{
			calc.Result = new List<TwitterStatusItem>();
			foreach (var status in statusses)
			{
				var item = new TwitterStatusItem { Published = status.CreatedAt, ScreenName = status.User.ScreenName, Text = status.Text };
				calc.AddItem(item);
				var links = ExtractLinksFormText(item.Text);
				this.GetLinkMetadatas(links, list => item.Links = list);
			}
		});
	return result;
} 
	

This method uses a Calculate workflow element to assemble a result from multiple parallel requests in a thread save manner. The CalculeateResult type makes this method awaitable in the calling context, as seen before. Two methods are used to analyze the short URLs in the status text. First the ExtractLinksFormText retrieves all URLs from the text:

public static List<Uri> ExtractLinksFormText(string text)
{
	var result = new List<Uri>();
	var linkParser = new Regex(@"b(?:https?://|www.)S+b", RegexOptions.Compiled | RegexOptions.IgnoreCase);
	foreach (Match match in linkParser.Matches(text))
	{
		result.Add(new Uri(match.Value, UriKind.RelativeOrAbsolute));
	}
	return result;
}	

Second the GetLinkMetadatas() resolve the short URL and retrieve some data from the page:

public CalculateResult<List<LinkMetadata>> GetLinkMetadatas(IEnumerable<Uri> links, Action<List<LinkMetadata>> successHander)
{
	var result = new Calculate<List<LinkMetadata>, LinkMetadata>(
		new CalculateConfig<List<LinkMetadata>, LinkMetadata>
		{
			Successful = calc =>
			{
				if (successHander != null)
				{
					successHander.Invoke(calc.Result);
				}
			},
			StartWork = calc =>
			{
				calc.Result = new List<LinkMetadata>();
				var index = 0;
				foreach (var link in links)
				{
					var pos = index++;
					new Limit(
						new LimitConfig
						{
							LimiterName = "WebsiteRequestLimiter",
							StartWork = async limited =>
							{
								var request =
								await new HttpRequest(
									new HttpRequestConfig
									{
										Url	= link,
										Quota =	new HttpRequestQuota(),
										AutoPerformRedirects = true
									});
								calc.SetItem( pos, GetLinkMetadata( request));
							}	
						});
				}
			}
		});
	return result;
}	

The HttpRequest performs the redirects and the target page is analyzed. A notable feature of the Calculate workflow element is the SetItem() method which allows to set the item on a specific position in the list in a thread save manner. It expands an empty list, so that the position (index) become accessable. This is important here because we want to keep the ordering of the links, regardless which request completes first. If we had used AddItem() the results the results would have the same ordering as the requests are completing. Keep in mind all of these requests are executed in parallel. Only the Limit workflow element controls the throughput or how many requests are executed really in parallel.

The Crawler-Lib Engine provides new opportunities to design background tasks. Access to arbitrary APIs can be integrated in the workflow with little effort. The various workflow control elements like Limit and Calculate give a fine gained control over complex operations.

Using the Code

To run this sample you must register an application. We recommend to add an test Twitter account for this purpose. You must have a mobile phone number associated with your account to create an Twitter App. Applications are registered at https://apps.twitter.com/.

After you have created your applications generate your keys and access tokens. Copy the Consumer Key, Consumer Secret, Access Token and Access Token Secret into the initializers for the static fields. This is done in Progam.cs in the Mein() method.

This sample crawls only one twitter user. You may add more of them to see the limiters punch in. It has no full blown scheduler. If you intend to implement this in a real application, please read:

Building, Debugging and Testing Services in C# with the Crawler-Lib Framework

The Back-End Service Components are designed to allow to code back-end services that can be flexible hosted as windows service, Linux demon and in the cloud. But they allow also to test and debug services on the local machine in a uncommon way. It is a flexible middle way between monolithic hard coded back-end services and back-end as a service (BaaS) providers. Backend as a Service and Software as a Service providers couple couple two things that are very different: Modularization of the back-end and the hosting of the back-end. The Crawler-Lib service infrastructure prevents from a hosting provider lock in. It just brings the benefits of modularization and configuration to the back-end development. You choose the hosting of your back-end yourself.

Structure and Building Blocks

The service is build with several components and completely configured with the App.config configuration file. The idea behind this is to develop a service on the developer machine without to worry about deployment and hosting.

Crawler-Lib Service Stack

Hosts

The flexible configuration of hosts allows to deploy the service in different ways. There is a Windows Service host, a Linux demon host and cloud hosting is also possible. But more important, there is a WinForms Service Testing Host (NuGet package) which allows to set up a development and testing environment with ease.

Modules

The service infrastructure is designed to use service modules as composition block. As a user and developer you divide your back-end service into modules. Several predefined modules are in the release chain. Most important the Crawler-Lib Engine module, which integrates generalized task processing capabilities in the back-end service. But also a generalized WCF host to set up WCF endpoints just in the configuration. Standardization of additional back-end components will follow.

Databases

In conjunction with an upcoming storage operation processor the databases are the encapsulation and massive performance optimization of any kind of storage in a back-end service.

Components

Inversion of Control is used to decouple the service components. During the service startup the modules and database are wired. The modules and databases register its types and instances in certain phases of the service startup and resolve the needed components in a later phase. So the modules are containers for components.

Development

In classic service development the service itself is often monolithic and contains huge functionality in just one DLL or executable. The Crawler-Lib Service approach is similar to decoupled patterns often used in front-ends and BaaS platforms. It encourages the developer to divide the service functionality in small components and assemble them in handy modules with a exact specified functionality.

The most important change to classical service development is that the functionality is integrated in form of basically independent modules which provide and consume components. The infrastructure for a new service project is simply added as NuGet packages into a class library project in Visual Studio. Due to the component oriented infrastructure and the modularization non trivial projects should be split in several components and modules. This is both: Architectural structuration and a smooth way to put large or multiple teams on the project. It is very agile and supports also a wide range of project management and development mythologies like Test Driven Development, Scrum and so on.

Different concepts can be combined to build a flexible infrastructure. For example child processes are integrated by default. This allows a master service so start and control child services. This can be used  to separate critical components from the master process, to stop and restart child processes when they crash or when they are no longer needed. The mixing of 32Bit and 64 Bit processes is also possible to use legacy 32Bit components.

Crawler-Lib Service Child Processes

Distributed services can be easily implemented using WCF. As mentioned a full featured WCF host module and a matching WCF client component are already in the release pipeline. So it will becaome easy to develop distributed computing back-ends like rendering farms or crawler farms.

Crawler-Lib Distributed Services

Testing

Due to the flexible hosting capabilities it is easy to test a service. As mentioned above Crawler-Lib provides the Service Testing Host which is a console host with a WinForms GUI testing frontend. It allows to interact with the running service and trigger functions and test code. This is especially important when a complex service has a very long startup time. Instead of starting the service over and over again to test some functionality, we can edit and execute C# test code while the service is running.

There is also no need to upload you service to any platform for testing purposes. Testing is possible on the developer machine or on a continuous integration server.

Deployment

Like other .NET applications the service deployment is mainly XML configuration (App.config) and XCOPY deployment. A little integration stuff must be done on the platforms, like installing a windows service or adding the demon to the Linux startup. This can be done with using the platform specific tools like PowerShell or BASH. In the future we will provide packages for this which can be installed with the platform specific package tools like a Chocolatey, APT (apt-get) or the upcoming OneGet (Windows Management Framework 5.0).

Building NHunspell with PowerShell Build Tools

The PowerShell Build Tools are a free toolbox for build, test and deployment automation. The Build Tools combine XML configuration and PowerShell scripting in a new way to get the best of both worlds. NHunspell is a free wrapper for the Open Office Spell Checker Hunspell. Although NHunspell is a small project, it has a rather complex build and deployment workflow due to its native assemblies. We want to make this a bit easier so we switched the NHunspell build process to our new PowerShell based Build Tools. This is a real word use case which demonstrates a lot of the features.

NHunspell Build and Deployment

These are the steps that should be performed during a NHunspell build:

  1. Version Update
    Update all version strings in the solution to match the current build
  2. Compile the 32Bit Native DLL
  3. Compile the 64Bit Native DLL
  4. Compile the NHunspell Assembly
  5. Check the Files
    Check if all files are compiled and have the correct version resource
  6. Run the Unit Tests
  7. Create Zip Files
  8. Create NuGet Packages
  9. Test Deploy the Packages

So theses steps are automated using the PowerShell Build Tools.

PowerShell Build Tools in Action

 In this Video we show how NHunspell is build from PowerShell, within Visual Studio and on a Jenkins Build Server. It also shows how the build configuration can be edited and debugged.

Watch directtly on Youtube unter  Building the NHunspell Spell Checker with PowerShell Build Tools

 Build Configuration

The PowerShell Build Tools use a XML configuration file with the default name BuildConfig.xml. Here are the most important parts from the NHunspell  BuildConfig.xml:

XML Declaration

<?xml version="1.0" encoding="utf-8"?>
<!-- Build configuration for NHunspell -->
<BuildConfig xmlns="http://www.crawler-lib.net/build-tools"
xmlns:xsi="http://www.w3.org/2001/XMLSchema-instance"
xsi:schemaLocation="http://www.crawler-lib.net/build-tools http://download.crawler-lib.net/BuildTools/BuildConfig.xsd?action=view">

This XML declaration links to the current build tools schema definition and can be used to enable IntelliSense in Visual Studio.

Build Labeling

<Label>
  <BuildRevisionTimestamp/>
</Label>

The Build is labeled with the Build/Revision Timestamp tool. It works the same way as assemblies are versioned when *.* is specified as build and revision numbers.

Credentials for the Build Steps

<Credentials>
<Plain>
NuGetFeed=http://buildserver:8050/nuget/Test
NuGetApiKey=b763316f-25c2-4d17-bf0a-1c22e071eb05
</Plain>
</Credentials>

The credentials section allows to specify credentials for the use in the build steps later.

Solutions and Versions

<Solutions>
  <!-- The NHunspell solution to build, not to be confused with a visual studio solution -->
  <Solution Name="NHunspell">
  <Version>
    <AppendLabel>1.2</AppendLabel>
  </Version>
  ...

The PowerShell Build Tools are able to build a bunch of solutions during one build. The typical use case for this are solutions that need to have the same build label, but use different versioning. The versioning tool is specified for each solution and in ths sase it appends simply the build label to a fully qualified version.

    Build Sequences

<BuildSequences>

The build sequences are collections of build steps that can be executed to get to a certain stage in the build process. The PowerShell Build Tools use an incremental approach to get a build done. There is a special sequence called “Clear-Build” that clears the current build and forces an completely new build.

New-Build Sequence  

<BuildSequence Name="New-Build">
<!-- Patching the version of the projects to the current build version -->
<Autover Path="..HunspellWindowsHunspellWindows.sln" />
<Autover Path="NHunspell.sln" />
<!-- Compiling the native hunspell DLLs for Windows -->
<MSBuild Path="..HunspellWindowsHunspellWindows.sln" Configuration="Release" Platform="x86" />
<MSBuild Path="..HunspellWindowsHunspellWindows.sln" Configuration="Release" Platform="x64" />
<!-- Compiling NHunspell itself -->
<MSBuild Path="NHunspell.sln" Configuration="Release" Platform="Any CPU" />
<!-- Test if all files exist, have the correct file and product versions and are newly build --> 
<VerifyFile Path="UnitTestsbinreleaseHunspellx86.dll" FileVersion="true" ProductVersion="true" New="true"/>
<VerifyFile Path="UnitTestsbinreleaseHunspellx86.pdb" FileVersion="false" ProductVersion="false" New="true"/>
<VerifyFile Path="UnitTestsbinreleaseHunspellx64.dll" FileVersion="true" ProductVersion="true" New="true"/>
<VerifyFile Path="UnitTestsbinreleaseHunspellx64.pdb" FileVersion="false" ProductVersion="false" New="true"/>
<VerifyFile Path="UnitTestsbinreleaseNHunspell.dll" FileVersion="true" ProductVersion="true" New="true"/>
<VerifyFile Path="UnitTestsbinreleaseNHunspell.pdb" FileVersion="false" ProductVersion="false" New="true"/>
<VerifyFile Path="UnitTestsbinreleaseUnitTests.exe" FileVersion="true" ProductVersion="true" New="true"/> 
</BuildSequence>

The NHunspell build uses the New-Build Sequence to patch the versions of all projects in the solutions with the Autover tool. After that the native DLLs and NHunspell is compiled using MSBuild. Least it is checked if the generated files are new and if they have the correct version.  

Test-Build Sequence

<BuildSequence Name="Test-Build" Depends="New-Build" NewBuild="false">
<!-- Performing several tests with the new files -->
<NUnit Path="UnitTestsbinreleaseUnitTests.exe" />
<FxCop Path="UnitTestsbinreleaseNHunspell.dll" /> 
</BuildSequence> 

The Test-Build Sequence runs NUnit and FxCop to test NHunspell. The Test-Build sequence depends on the New-Build sequence. If the build is clear, the Build Tools will execute the New-Build sequence first. If there is a current build with a successful New-Build sequence, the Test-Build sequence will use the current build and perform the tests on the already available build results. This concept allows to modularize the steps and cuts down the time needed to develop a certain build sequence.  

Complete-Build Sequence

<BuildSequence Name="Complete-Build" Depends="Test-Build" NewBuild="false">
<!-- Make a zipped release package -->
<Zip Path="UnitTestsbinreleaseHunspellx86.dll" Target="Hunspellx86.dll" Output="NHunspell.$($context.PackageVersion).zip" />
<Zip Path="UnitTestsbinreleaseHunspellx86.pdb" Target="Hunspellx86.pdb" Output="NHunspell.$($context.PackageVersion).zip" />
<Zip Path="UnitTestsbinreleaseHunspellx64.dll" Target="Hunspellx64.dll" Output="NHunspell.$($context.PackageVersion).zip" />
<Zip Path="UnitTestsbinreleaseHunspellx64.pdb" Target="Hunspellx64.pdb" Output="NHunspell.$($context.PackageVersion).zip" />
<Zip Path="UnitTestsbinreleaseNHunspell.dll" Target="NHunspell.dll" Output="NHunspell.$($context.PackageVersion).zip" />
<Zip Path="UnitTestsbinreleaseNHunspell.pdb" Target="NHunspell.pdb" Output="NHunspell.$($context.PackageVersion).zip" />
<!-- Write Release Info file --> 
<AppendText Output="NHunspell.$($context.PackageVersion).zip.info.xml">
<![CDATA[<?xml version=`"1.0`" encoding=`"utf-8`" ?>
<infos>
<summary>NHunspell Release Version $($context.Version)</summary>
<description>
<a href=`"http://www.crawler-lib.net/nhunspell`">NHunspell</a> Release Version $($context.Version)
</description>
</infos>]]>
</AppendText>
<!-- Update the version and dependencies versions in the NuSpec file -->
<NuSpecUpdate>
<NuSpec Path ="NHunspell.nuspec" />
</NuSpecUpdate>
<!-- Pack the NuGet package -->
<NuGetPack Path ="NHunspell.nuspec"/> 
</BuildSequence> 

The Complete-Build sequence depends on the Test-Build sequence, so the build can only be completed if successfully tested. In the Complete-Build sequence the Zip- and NuGet packages are created. As you can see some string values  contain PowerShell code which is escaped with the dollar sign ($) as usual in PowerShell. 

Publish-Build Sequence

<!-- Publishes the previously created build -->
<BuildSequence Name="Publish-Build" Depends="Test-Build" NewBuild="false">
<NuGetPush Path ="NHunspell.$($context.PackageVersion).nupkg" ApiKey="$($context.Credentials.NuGetApiKey)" Feed="$($context.Credentials.NuGetFeed)"/>
</BuildSequence> 
</BuildSequences>
</Solution>
</Solutions>
</BuildConfig> 

The Publish-Build sequence performs a publish step on our internal test NuGet feed.

Executing and Debugging XSL Transformations in PowerShell

Unfortunaly the is no Cmdlet to execute XSL Transformations in PowerShell. During the development of the Xslt build step of the Crawler-Lib Build-Tools I had to deal with this. This is a small post about executing and debugging XSLT in PowerShell. 

Executing XSLT in PowerShell

The implementation of the XSLT build step shows how to pass parameters and activate debugging prior to the execution of the XSL Transformation:  

function Invoke-BuildStep_Xslt_Tool($context)
{
  $path = Expand-ParameterString $context.Step.Path
  $template = Expand-ParameterString $context.Step.Template
  $output = Expand-ParameterString $context.Step.Output
  if( ! (test-path $path )) { Throw"XML input file not found: $path"}
  $path = resolve-path $path 
  if( ! (test-path $template )) { Throw"XSL template file not found: $template"}
  $template = resolve-path $template 
  $output = [System.IO.Path]::GetFullPath([System.IO.Path]::Combine((Get-Location), $output))
  if( [System.Diagnostics.Debugger]::IsAttached )
  {
    $xslt = New-Object System.Xml.Xsl.XslCompiledTransform( $true )
  }
  else
  {
    $xslt = New-Object System.Xml.Xsl.XslCompiledTransform( $false )
  }
  $arglist = new-object System.Xml.Xsl.XsltArgumentList
  $arglist.AddParam("Config", "", $context.Config)
  $arglist.AddParam("CurrentBuild", "", $context.CurrentBuild)
  $arglist.AddParam("BuildCreatedUtc", "", $context.BuildCreatedUtc)
  $arglist.AddParam("BuildCreatedLocal", "", $context.BuildCreatedLocal)
  $arglist.AddParam("BuildSequenceName", "", $context.BuildSequenceName)
  $arglist.AddParam("Step", "", $context.Step)
  $arglist.AddParam("StepTool", "", $context.StepTool)
  $arglist.AddParam("StepNumber", "", $context.StepNumber)
  $arglist.AddParam("Version", "", $context.Version)
  $arglist.AddParam("FileVersion", "", $context.FileVersion)
  $arglist.AddParam("ProductVersion", "", $context.ProductVersion)
  $arglist.AddParam("PackageVersion", "", $context.PackageVersion)
  foreach( $param in $context.Step.Param )
  {
    $paramName = Expand-ParameterString $param.Name
    $paramNamespaceUri = Expand-ParameterString $param.NamespaceUri
    $paramValue = Expand-ParameterString $param.Value
    $arglist.AddParam($paramName, $paramNamespaceUri, $paramValue)
  }
  $xsltSettings = New-Object System.Xml.Xsl.XsltSettings($false,$true)
  $xslt.Load($template, $xsltSettings, (New-Object System.Xml.XmlUrlResolver))
  $outFile = New-Object System.IO.FileStream($output, [System.IO.FileMode]::Create, [System.IO.FileAccess]::Write)
  $xslt.Transform($path, $arglist, $outFile)
  $outFile.Close()
}

Debugging XSLT in PowerShell

Debugging of XSLT in PowerShell is possible with Visual Studio. The trick is to attach the PowerShell ISE or the PowerShell Command Processor to the Visual Studio debugger. This is simply be done by “Attach to Process …” under the “Debug” menu. After that the XSLT file must be loaded in Visual Studio. Then breakpoints can be added. After that preparation the PowerShell script and functions can be executed. When the  $xslt.Transform method is called the Visual Studio debugger will break on every breakpoint in the XSLT file.


.NET CLR Synchronization Mechanisms Performance Comparison

Multi threaded high throughput applications and services must choose the synchronization mechanisms carefully to gain an optimum throughput. I have ran several tests on different computers so I can compare common synchronization mechanisms in the Microsoft .NET CLR. Here are the results:

Test Results

Processor Empty Loop Interlocked Locked Polling Reader Writer Lock
Read / Write
 AMD Opteron 4174 HE 2.3 GHz 10.4 ms 30.6 ms 90.8 ms 1095 ms  208 ms  / 182 ms
 AMD Athlon 64 X2 5600+ 2.9 GHz 7,1 ms 19.9 ms 37.8 ms 546 ms 88.9 ms / 82.8 ms
 Intel Core 2 Quad Q9550 2.83 GHz 4.3 ms 19.3 ms 56.2 ms 443 ms  99 ms / 82.6 ms
Azure A1 (Intel Xeon E5-2660 2.2 GHz) 8.0 ms 19.9 ms 57.5 ms 502 ms 108 ms / 104 ms
Processor Auto Reset
Event
Manual Reset
Event
Semaphore Mutex Thread Static
 AMD Opteron 4174 HE 2.3 GHz 2927 ms 3551 ms 2732 ms 2764 ms 12.8 ms
 AMD Athlon 64 X2 5600+ 2.9 GHz 1833 ms 2052 ms 1870 ms 1733 ms 18,2 ms
 Intel Core 2 Quad Q9550 2.83 GHz 1015 ms 1328 ms 1169 ms 1099 ms 13.2 ms
Azure A1 (Intel Xeon E5-2660 2.2 GHz) 1576 ms 2215 ms 1760 ms 1847 ms 8.4 ms

As we see, there are huge differences in the throughput of the synchronization mechanisms. Next i wil discuss each mechanism and its use cases.

.NET Synchronization Mechanisms

Interlocked (Interlocked.Increment …)

Interlocked access has 3-4 times the overhead than unsynchronized access. It is best, when a single variable must be modified. If more than one variable must be modified, consider the use of the lock statement. On standard hardware a throughput of 400.000.000 Interlocked operations per second can be achieved.

Locked (C# lock Statement)

Locked access is about 5-10 times slower than unsynchronized access. It is quite equal to Interlocked when two variables must be modified. From a general perspective it is fast and there is no need for tricks (malicious double locking) to avoid it. On standard hardware a throughput of 200.000.000 lock operations per second can be achieved.

Polling (Thread.Sleep)

The overhead of Thread.Sleep itself has an overhead of about 100 times, which is quite equal to other complex synchronization mechanisms like events and semaphores. Polling with Thread.Sleep(0) can achieve a throughput of about 1.500.000 operations per second. But it burns a lot of CPU cycles. Due to the fact that Thread.Sleep(1) will sleep about 1.5 ms, you can’t get much more than 750 operations per second with a real polling mechanism that doesn’t burn a lot of CPU cycles. Polling is a no go for high throughput synchronization mechanisms.       

Reader Writer Lock (ReaderWriterLockSlim)

A reader / writer lock is about two times slower than locked access. It has an overhand of about 15-20 times to the unsynchronized access. The acquiring of the lock itself has nearly no difference if you choose read or write access. It has a throughput of nearly 100.000.000 lock operations per second on standard hardware. It is meant for for resources with a lot of readers and one (or only a view) writers and in this scenarios you should use it.

Auto Reset Event (AutoResetEvent)

An auto reset event is about 100-150 times slower than the unsynchronized access. It has an throughput of about 700.000 operations per second.

Manual Reset Event (ManualResetEvent)

An manual reset event is about 150-200 times slower than the unsynchronized access. It has an throughput of about 500.000 operations per second. You should check if your architecture requires the manual reset, and consider to use the faster auto reset event if possible.

Semaphore (SemaphoreSlim)

An semaphore is about 100-150 times slower than the unsynchronized access and has an throughput of about 700.000 operations per second. There is no alternative to its functions

Mutex (Mutex)

A mutex is about 100-150 times slower than the unsynchronized access and has an throughput of about 700.000 operations per second. There

Thread Static Field ([ThreadStatic] static)

Last but not least the thread static field. It isn’t a synchronization mechanism, but it is a great way to avoid synchronization at all. With a thread static each tread can keep its own object to work with. So there is possibly no need to synchronize with other thread. Thread static field access is about 2-3 times slower than unsynchronized access.

Conclusion

If you have to synchronize a piece of code that runs much longer than 0.1 milliseconds or has a throughput less than 10.000 operations per second, don’t worry about the performance of the synchronization mechanisms. they are all fast enough and will have nearly no performance impact to the rest of your code. It is more important to avoid over-synchronization than to choose the fastest method. If you have to synchronize small operations with a throughput of 100.000+ operations per second, the synchronization mechanism must be optimized to gain not too much impact on the throughput.

Source Code

Here is the C# source code for the tests:

using System;
using System.Collections.Generic;
using System.Linq;
using System.Text;
using System.Diagnostics;
using System.Threading;
namespace ThreadingPerformance
{
    public class StaticFieldTestClass
    {
        public static int StaticField;
        [ThreadStatic]
        public static int ThreadStaticField;
    }
    public class Program
    {
        public static int mtResource; // Resource and methods are public to prevent compiler optimizations
        private static object resourceLock;
        private static ReaderWriterLockSlim resourceReaderWriterLockSlim;
        private static AutoResetEvent resourceAutoResetEvent;
        private static ManualResetEvent resourceManualResetEvent;
        private static Semaphore resourceSemaphore;
        private static Mutex resourceMutex;
        public static void Main(string[] args)
        {
            Console.WriteLine("Performance Tests");
            Console.WriteLine("  Stopwatch Resolution (nS): " + (1000000000.0 /Stopwatch.Frequency).ToString());
        resourceLock = new object();
        resourceReaderWriterLockSlim = new ReaderWriterLockSlim();
        resourceAutoResetEvent = new AutoResetEvent(true);
        resourceManualResetEvent = new ManualResetEvent(true);
        resourceSemaphore = new Semaphore(1,1);
        resourceMutex = new Mutex();
            RunTests(1000000);
            Console.WriteLine("Tests Finished, press any key to stop...");
            Console.ReadKey();
        }
        public static void RunTests(int iterations)
        {
            Console.WriteLine("  Iterations: " + iterations.ToString());
            Stopwatch watch = new Stopwatch();
            Console.WriteLine();
            Console.WriteLine("  Simple (Empty) Call - Bias for all tests");
            SimpleCall();
            SimpleCall();
            watch.Reset();
            watch.Start();
            for (int i = 0; i < iterations; ++i)
                SimpleCall();
            watch.Stop();
            Console.WriteLine("  Simple (Empty) Call Elapsed Time (mS): " + ((double)watch.ElapsedTicks / Stopwatch.Frequency * 1000).ToString());
            Console.WriteLine();
            Console.WriteLine("  Interlocked Call");
            InterlockedCall();
            InterlockedCall();
            watch.Reset();
            watch.Start();
            for (int i = 0; i < iterations; ++i)
                InterlockedCall();
            watch.Stop();
            Console.WriteLine("  Interlocked Call Elapsed Time (mS): " + ((double)watch.ElapsedTicks / Stopwatch.Frequency * 1000).ToString());
            Console.WriteLine();
            Console.WriteLine("  Locked Call");
            LockCall();
            LockCall();
            watch.Reset();
            watch.Start();
            for (int i = 0; i < iterations; ++i)
                LockCall();
            watch.Stop();
            Console.WriteLine("  Locked Call Elapsed Time (mS): " + ((double)watch.ElapsedTicks / Stopwatch.Frequency * 1000).ToString());
            Console.WriteLine();
            Console.WriteLine("  Polling Call");
            PollingCall();
            PollingCall();
            watch.Reset();
            watch.Start();
            for (int i = 0; i < iterations; ++i)
                PollingCall();
            watch.Stop();
            Console.WriteLine("  Polling Call Elapsed Time (mS): " + ((double)watch.ElapsedTicks / Stopwatch.Frequency * 1000).ToString());
            Console.WriteLine();
            Console.WriteLine("  ReaderWriterLockSlim Read Call");
            ReaderWriterLockSlimReadCall();
            ReaderWriterLockSlimReadCall();
            watch.Reset();
            watch.Start();
            for (int i = 0; i < iterations; ++i)
                ReaderWriterLockSlimReadCall();
            watch.Stop();
            Console.WriteLine("  ReaderWriterLockSlim Read Call Elapsed Time (mS): " + ((double)watch.ElapsedTicks / Stopwatch.Frequency * 1000).ToString());
            Console.WriteLine();
            Console.WriteLine("  ReaderWriterLockSlim Write Call");
            watch.Reset();
            watch.Start();
            for (int i = 0; i < iterations; ++i)
                ReaderWriterLockSlimWriteCall();
            watch.Stop();
            Console.WriteLine("  ReaderWriterLockSlim Write Call Elapsed Time (mS): " + ((double)watch.ElapsedTicks / Stopwatch.Frequency * 1000).ToString());
            Console.WriteLine();
            Console.WriteLine("  AutoResetEvent Call");
            watch.Reset();
            watch.Start();
            for (int i = 0; i < iterations; ++i)
                AutoResetEventCall();
            watch.Stop();
            Console.WriteLine("  AutoResetEvent Call Elapsed Time (mS): " + ((double)watch.ElapsedTicks / Stopwatch.Frequency * 1000).ToString());
            Console.WriteLine();
            Console.WriteLine("  ManualResetEvent Call");
            watch.Reset();
            watch.Start();
            for (int i = 0; i < iterations; ++i)
                ManualResetEventCall();
            watch.Stop();
            Console.WriteLine("  ManualResetEvent Call Elapsed Time (mS): " + ((double)watch.ElapsedTicks / Stopwatch.Frequency * 1000).ToString());
            Console.WriteLine();
            Console.WriteLine("  Semaphore Call");
            watch.Reset();
            watch.Start();
            for (int i = 0; i < iterations; ++i)
                SemaphoreCall();
            watch.Stop();
            Console.WriteLine("  Semaphore Call Elapsed Time (mS): " + ((double)watch.ElapsedTicks / Stopwatch.Frequency * 1000).ToString());
            Console.WriteLine();
            Console.WriteLine("  Mutex Call");
            watch.Reset();
            watch.Start();
            for (int i = 0; i < iterations; ++i)
                MutexCall();
            watch.Stop();
            Console.WriteLine("  Mutex Call Elapsed Time (mS): " + ((double)watch.ElapsedTicks / Stopwatch.Frequency * 1000).ToString());
            Console.WriteLine();
            Console.WriteLine("  StaticField Setter Call");
            StaticFieldSetter();
            StaticFieldSetter();
            watch.Reset();
            watch.Start();
            for (int i = 0; i < iterations; ++i)
                StaticFieldSetter();
            watch.Stop();
            Console.WriteLine("  StaticField Setter Call Elapsed Time (mS): " + ((double)watch.ElapsedTicks / Stopwatch.Frequency * 1000).ToString());
            Console.WriteLine();
            Console.WriteLine("  ThreadStaticField Setter");
            ThreadStaticFieldSetter();
            ThreadStaticFieldSetter();
            watch.Reset();
            watch.Start();
            for (int i = 0; i < iterations; ++i)
                ThreadStaticFieldSetter();
            watch.Stop();
            Console.WriteLine("  ThreadStaticField Setter Call Elapsed Time (mS): " + ((double)watch.ElapsedTicks / Stopwatch.Frequency * 1000).ToString());
            Console.WriteLine();
            Console.WriteLine("  StaticField Getter Call");
            StaticFieldGetter();
            StaticFieldGetter();
            watch.Reset();
            watch.Start();
            for (int i = 0; i < iterations; ++i)
                StaticFieldGetter();
            watch.Stop();
            Console.WriteLine("  StaticField Getter Call Elapsed Time (mS): " + ((double)watch.ElapsedTicks / Stopwatch.Frequency * 1000).ToString());
            Console.WriteLine();
            Console.WriteLine("  ThreadStaticField Getter");
            ThreadStaticFieldGetter();
            ThreadStaticFieldGetter();
            watch.Reset();
            watch.Start();
            for (int i = 0; i < iterations; ++i)
                ThreadStaticFieldGetter();
            watch.Stop();
            Console.WriteLine("  ThreadStaticField Getter Call Elapsed Time (mS): " + ((double)watch.ElapsedTicks / Stopwatch.Frequency * 1000).ToString());
        }
        public static void SimpleCall()
        {
            ++mtResource;
        }
        public static void InterlockedCall()
        {
            Interlocked.Increment(ref mtResource);
        }
        public static void LockCall()
        {
            lock (resourceLock)
            {
                ++mtResource;
            }
        }
        public static void PollingCall()
        {
            Thread.Sleep(0);
            lock (resourceLock)
            {
                ++mtResource;
            }
        }
        public static void ReaderWriterLockSlimReadCall()
        {
            resourceReaderWriterLockSlim.EnterReadLock();
            ++mtResource;
            resourceReaderWriterLockSlim.ExitReadLock();
        }
        public static void ReaderWriterLockSlimWriteCall()
        {
            resourceReaderWriterLockSlim.EnterWriteLock();
            ++mtResource;
            resourceReaderWriterLockSlim.ExitWriteLock();
        }
        public static void AutoResetEventCall()
        {
            resourceAutoResetEvent.WaitOne();
            ++mtResource;
            resourceAutoResetEvent.Set();
        }
        public static void ManualResetEventCall()
        {
            resourceManualResetEvent.WaitOne();
            resourceManualResetEvent.Reset();
            ++mtResource;
            resourceManualResetEvent.Set();
        } 
        public static void SemaphoreCall()
        {
            resourceSemaphore.WaitOne();
            ++mtResource;
            resourceSemaphore.Release();
        }  
        public static void MutexCall()
        {
            resourceMutex.WaitOne();    
            ++mtResource;
            resourceMutex.ReleaseMutex();
        }
        public static void StaticFieldSetter()
        {
            StaticFieldTestClass.StaticField = ++mtResource;
        }
        public static void StaticFieldGetter()
        {
            mtResource += StaticFieldTestClass.StaticField;
        }
        public static void ThreadStaticFieldSetter()
        {
            StaticFieldTestClass.ThreadStaticField = ++mtResource;
        }
        public static void ThreadStaticFieldGetter()
        {
           mtResource += StaticFieldTestClass.ThreadStaticField;
        } 
    }
}


TimeSpan Calculation based on DateTime is a Performance Bottleneck

Some so small like DateTime.Now can be a bottleneck. On a typical windows system the Environment.TickCount is at least 100 times faster. You don’t believe it? Try it yourself! Here is the test code:

using System;
using System.Collections.Generic;
using System.Linq;
using System.Text;
namespace TimerPerformance
{
    using System.Diagnostics;
    class Program
    {
        static void Main(string[] args)
        {
            Console.WriteLine("Performance Tests");
            Console.WriteLine("  Stopwatch Resolution (nS): " + (1000000000.0 / Stopwatch.Frequency).ToString());
            RunTests();
            Console.WriteLine("Tests Finished, press any key to stop...");
            Console.ReadKey();
        }
        public static long DummyValue;
        public static void RunTests()
        {
            const int loopEnd = 1000000;
            Stopwatch watch = new Stopwatch();
            Console.WriteLine();
            Console.WriteLine("Reference Loop (NOP) Iterations: " + loopEnd);
            watch.Reset();
            watch.Start();
            for (int i = 0; i < loopEnd; ++i)
            {
                DummyValue += i;
            }
            watch.Stop();
            Console.WriteLine("  Reference Loop (NOP) Elapsed Time (ms): " + ((double)watch.ElapsedTicks / Stopwatch.Frequency * 1000).ToString());
            Console.WriteLine();
            Console.WriteLine("Query Environment.TickCount");
            watch.Reset();
            watch.Start();
            for (int i = 0; i < loopEnd; ++i)
            {
                DummyValue += Environment.TickCount;
            }
            watch.Stop();
            Console.WriteLine("  Query Environment.TickCount Elapsed Time (ms): " + ((double)watch.ElapsedTicks / Stopwatch.Frequency * 1000).ToString());
            Console.WriteLine();
            Console.WriteLine("Query DateTime.Now.Ticks");
            watch.Reset();
            watch.Start();
            for (int i = 0; i < loopEnd; ++i)
            {
                DummyValue += DateTime.Now.Ticks;
            }
            watch.Stop();
            Console.WriteLine("  Query DateTime.Now.Ticks Elapsed Time (ms): " + ((double)watch.ElapsedTicks / Stopwatch.Frequency * 1000).ToString());
            Console.WriteLine();
            Console.WriteLine("Query Stopwatch.ElapsedTicks");
            watch.Reset();
            watch.Start();
            for (int i = 0; i < loopEnd; ++i)
            {
                DummyValue += watch.ElapsedTicks;
            }
            watch.Stop();
            Console.WriteLine("  Query Stopwatch.ElapsedTicks Elapsed Time (ms): " + ((double)watch.ElapsedTicks / Stopwatch.Frequency * 1000).ToString());
        }
        
    }
}

Here we have the Results for some machines (1.000.000 Iterations, in milliseconds):

Hardware Empty Loop Environment.TickCount DateTime.Now.Ticks
 AMD Opteron 4174 HE 2.3 GHz  8.7 ms  16.6 ms  2227 ms
 AMD Athlon 64 X2 5600+ 2.9 GHz 6.8 ms  15.1 ms  1265 ms
 Intel Core 2 Quad Q9550 2.83 GHz 2.1 ms  4.9 ms  557.8 ms
Azure A1 (Intel Xeon E5-2660 2.2 GHz) 5.2 ms 19.9 ms 168.1 ms

Ok, the single request will only take about 1-2 microseconds for the DateTime.Now call. This is a maximum throughput of 500.000 to 1.000.000 calls per second. In contrast the Environment.TickCount has a maximum throughput of about 600.000.000 calls per second. If a particular operation needs 10 timestamps, it has an maximum throughput of 50.000 operations only because of DateTime.Now.For example an HTTP request that measures response time and throughput (data transfer rate) needs a timestamp for every chunk of data it receives from the web server. Until the operation completes there are at least 3 timestamps (begin, response, end) to measure response time and download time. If the throughput (data transfer rate) is measured it all depends on how many chunks are received. This is even bad for multi-threaded access. Both, Environment.Tick Count and DateTime.Now are shared resources. All calls must go to the synchronization mechanism of them, which means they are nor parallelized.   

Real systems like the Crawler-Lib Engine can perform 20.000 – 30.000 HTTP requests per second on relatively good hardware. So it is obvious that the time measurement cause an impact on the maximum throughput.

Some will argue, that DateTime.Now is much more precise than Environment.TickCount. This is partially true. Here we have a code snippet that measures the granularity of timestamps:

if( Environment.TickCount > int.MaxValue - 60000) throw new InvalidOperationException("Tick Count will overflow in the next minute, test can't be run");
var startTickCount = Environment.TickCount;
var currentTickCount = startTickCount;
int minGranularity = int.MaxValue;
int maxGranularity = 0;
while (currentTickCount < startTickCount + 1000)
{
    var tempMeasure = Environment.TickCount;
    if (tempMeasure - currentTickCount > 0)
    {
        minGranularity = Math.Min(minGranularity, tempMeasure - currentTickCount);
        maxGranularity = Math.Max(maxGranularity, tempMeasure - currentTickCount);
    }
    currentTickCount = tempMeasure;
    Thread.Sleep(0);
}
Console.WriteLine("Environment.TickCount Min Granularity: " + minGranularity + ", Max Granularity: " + maxGranularity + " ms");
Console.WriteLine();
var startTime = DateTime.Now;
var currentTime = startTime;
double minGranularityTime = double.MaxValue;
double maxGranularityTime = 0.0;
while (currentTime < startTime + new TimeSpan(0, 0, 1))
{
    var tempMeasure = DateTime.Now;
    if ((tempMeasure - currentTime).TotalMilliseconds > 0)
    {
        minGranularityTime = Math.Min(minGranularityTime, (tempMeasure - currentTime).TotalMilliseconds);
        maxGranularityTime = Math.Max(maxGranularityTime, (tempMeasure - currentTime).TotalMilliseconds);
    }
    currentTime = tempMeasure;
    Thread.Sleep(0);
}
Console.WriteLine("DateTime Min Granularity: " + minGranularityTime + ", Max Granularity: " + maxGranularityTime + " ms");

Running this on several machines shows that Environment.TickCount has a granularity of about 16ms (15.6 ms) which is the default  system wide timer resolution. The system wide timer resolution can be changed with the timeBeginPeriod function down to 1ms, but this is not generally recommended because it affects all applications. DateTime.Now has on some machines the granularity of 16ms on other machines a better granularity down to 1ms. But it is never much better than 1ms. If you need to measure smaller times, you have to use the System.Diagnostics.Stopwatch class witch is in fact an high resolution timer.  

As a consequence the Crawler-Lib Framework uses Environment.TickCount for timestamps that are needed to measure durations for responses or tasks or whatever. Soon we release the Crawler-Lib Core library for free, which contains a TickTimestamp class that can be used for duration and throughput computations.

TinyMCE 4.x Preformatted Text and Syntax Highlighting

We use the SyntaxHighlighter from Alex Gorbachev on thios page to highlight our code. Unfortunately TinyMCE has some issues with pre-formatted text (pre HTML element). Most important: It places line breaks (<br />) after the lines. After some research I ended up with the following setup:

    $(document).ready(function () {
        fixNewLines = function (content) {
            var codeBlocks = content.match(/<pre.*?>[^]*?</pre>/mg);
            console.log('codeBlocks', codeBlocks);
            if(codeBlocks == null) return content;
            for(var index=0; index < codeBlocks.length; index++) {
                content = content.replace(codeBlocks[index], codeBlocks[index].replace(/<brs*/?>/mgi, "n"));
            }
            return content;
        }
        tinymce.init({
            selector: "#@ViewData.TemplateInfo.GetFullHtmlFieldId(string.Empty)",
            entity_encoding: "raw",
            content_css : "/Content/tinymce/Customized.css",
            height: 450,
            width: 790,
            plugins: [
                "advlist autolink lists link image charmap print preview anchor template",
                "searchreplace visualblocks fullscreen",
                "code additional_formats",
                "insertdatetime media table contextmenu paste@(canUploadPictures ? " jbimages" : null)"
            ],
            toolbar1: " formatselect styleselect template link image@(canUploadPictures ? " jbimages" : null) | undo redo code",
            toolbar2: "bold italic codeElement varElement | bullist numlist outdent indent | alignleft aligncenter alignright alignjustify ",
            //"relative_urls" required by jbimages plugin to be set to "false"
            //but in this case it'll break existing links (e.g. message template tokens)
            relative_urls: true,
            templates: [
                   { title: 'C# Code Template', content: '<pre class="brush: csharp;">/*Code Goes Here*/</pre>' },
                   { title: 'JavaScript Code Template', content: '<pre class="brush: js;">/*Code Goes Here*/</pre>' }
            ],
            setup: function (editor) {
                editor.on('BeforeSetContent', function (e) {
                    console.log('BeforeSetContent event', e);
                    e.content = fixNewLines(e.content);
                });
                editor.on('SaveContent', function (e) {
                    console.log('SaveContent event', e);
                    e.content = fixNewLines(e.content);
                });
                editor.on('GetContent', function (e) {
                    console.log('GetContent event', e);
                    e.content = fixNewLines(e.content);
                });
            }
        });
    });

This code removes the <br /> stuff from the pre elements. It is not very elaborated at the moment, but it works quite good.

Additionally i want to have a better WYSIWYG experience with TinyMCE, so i added a custom style sheet, to make a pre element look nicer in the editor. This is the stylesheet.

h1 {
}
h2 {
    margin-top: 10px;
    margin-bottom: 5px;
}
h3 {
    margin-top: 8px;
    margin-bottom: 4px;
}
p {
    margin-top: 3px;
    margin-bottom: 7px;
}
a {
    color: #003399;
    text-decoration: underline;
}
pre {
    font-family: consolas, monospace;
    font-weight: normal;
    color: #069;
    border-top: 1px dotted #a9a9a9; 
    border-bottom: 16px solid #ededed;
    border-left: 3px solid #6CE26C;
    margin-left: 28px;
    padding: 3px 0px 5px 7px  ;
}
code {
    font-family: consolas, monospace;
    font-weight: bold;
    color: #069;
}
    code a {
        font-family: consolas, monospace;
        font-size: 100%;
        font-weight: bold;
        color: #069;
        text-decoration: underline;
    }
a > code {
    font-family: consolas, monospace;
    font-size: 100%;
    font-weight: bold;
    color: #069;
    text-decoration: underline;
}
ul {
    list-style-type: disc;
    padding-left: 14px;
    margin-top: 3px;
    margin-bottom: 7px;
}
    ul > li {
        margin-bottom: 4px;
    }
ol {
    list-style-type: decimal;
    padding-left: 14px;
    margin-top: 3px;
    margin-bottom: 7px;
}
    ol > li {
        margin-bottom: 4px;
    }

This styles give the pre and code elements the same spacing and kind of the same visual appearance as the have on the real site. Now it looks like this when I edit topics with pre elements:

TinyMCE Preformatted Source Code Block

The topic in the editor is: Simple Task Sample: Crawl a Website and Extract all Links

TinyMCE Additional HTML Elements

I wanted to have buttons for the code and var HTML elements in the TinyMCE editor. The code element was already there, but there was no predefined var element. It is a nice wednesday evening, so i decided to write a plugin for this. Here is the first shot of code:

/* Additional Elements Plugin */
function checkParentsContainingElement(parents, element) 
{
    for (i in parents) {
        if (parents[i].nodeName == element)
            return true;
    }
    return false;
}
(function () {
    tinymce.create('tinymce.plugins.additional_formatsPlugin', {
        init: function (editor, url) {
            editor.on('init', function(args) {
                console.log('Editor was clicked', args);
                // Register Formats
                args.target.formatter.register('var', {
                    inline: 'var',
                    toggle: true,
                });
            });
            // Register Commands
            editor.addCommand('mceCodeElement', function () { editor.formatter.toggle('code'); } );
            editor.addCommand('mceVarElement', function () { editor.formatter.toggle('var'); });
            // Register Buttons
            editor.addButton('codeElement', {
                title: 'Code',
                cmd: 'mceCodeElement',
                image: url + '/img/codeElement.png',
                onPostRender: function() {
                    var ctrl = this;
                    editor.on('NodeChange', function(e) {
                        ctrl.active(checkParentsContainingElement(e.parents, 'CODE'));
                    });
                }
            });
            editor.addButton('varElement', {
                title: 'Var',
                cmd: 'mceVarElement',
                image: url + '/img/varElement.png',
                onPostRender: function () {
                    var ctrl = this;
                    editor.on('NodeChange', function(e) {
                        ctrl.active(checkParentsContainingElement(e.parents, 'VAR'));
                    });
                }
            });
        },
        getInfo: function () {
            return {
                longname: 'Additional Formats Plugin',
                author: 'Thomas Maierhofer',
                authorurl: '',
                infourl: '',
                version: tinymce.majorVersion + "." + tinymce.minorVersion
            };
        }
    });
    // Register Plugin
    tinymce.PluginManager.add('additional_formats', tinymce.plugins.additional_formatsPlugin);
})();

The sourcecode is LGPL, If someone needs the complete plugin, please write a message and I provide a download link.

C# Async Await Pattern Without Task. Making the Crawler-Lib Workflow Elements Awaitable

C# 5.0 has introduced the async / await pattern. Where the keyword async specifies that a method, lambda expression or anonymous method is asynchronous. In fact it says that you can use the await keyword to await something. In case of a Task it is the competition.

This is how await works:

  var result = await awaitableObject;

This code is roughly transformed in something like this:

var awaiter = awaitableObject.GetAwaiter();
if( ! awaiter.IsCompleted )
{
  SAVE_STATE()
  (INotifyCompletion awaiter).OnCompleted( continuation)
  return;
}
continuation.Invoke()
... 
continuation = () =>
{
  RESTORE_STATE()
  var result = awaiter.GetResult();
}

In fact everything can be made awaitable, even existing classes without modifying them. An object becomes awaitable when it implements a GetAwaiter() method that returns an awaiter for the class. This can be done with an extension method, so the class itself needs not to be modified. The returned awaiter must implement the following things:

bool IsCompleted { get; }
TResult GetResult(); // TResult can also be void
// and implement ethier the INotifyCompletion or ICriticalNotifyCompletion interface

So, what can we do with it without tasks?

We use it in the Crawler-Lib Framework to make our workflow elements awaitable.

  await new Delay(3000);
  // Work after Delay

instead of providing a handler

  new Delay(3000, delay => { 
    // Work after Delay
  });

That avoids the deeply nested delegates – and lambda expressions – in case of long sequences. The user of the framework can implement sequences very nice, readable and debugable. We will also use it for our upcoming Storage Operation Processor component, to provide a convenient war to write sequences of storage operations, that are internally queued and optimized.

Social Media APIs and Cloud Service Operation Costs Measurement: Expense Workflow Element

Social media service APIs, cloud services or even internal datacenter resources have operation costs that must sometimes be measured. The Expense workflow element is an upcoming feature of the Crawler-Lib Engine.  It introduces a generalized measuring mechanism for operation costs. It can be used when a task accesses APIs like the Facebook Graph API, Facebook FQL , Twitter REST API, Google GData API, Microsoft Azure, Amazon EC2 and so on. It tracks how many costs this API calls have used and delivers them aggregated in the task result.


It works hand in hand with another new workflow element called Limit, which allows limiting the parallelism and the throughput.  In conjunction with the Expense workflow element workflows can be limited based on the operation costs they will produce.

With these upcoming features it is easy to access those APIs respecting the quotas and without exceeding any limits. It is also possible to collect internal operation costs and bill them to the customers as a cost based service fee.